Materials and Tools Needed
Before starting your crochet pencil case, gather the necessary materials and tools. Using the right supplies ensures a smooth crafting experience and helps create a durable and stylish pencil case.
Yarn Types and Colors
Select yarn suited for projects like pencil cases. Cotton yarn works well for a sturdy and neat finish. Acrylic yarn is also a good option for colorful and affordable creations. Choose vibrant or pastel colors that complement your style. Variegated yarns can add a fun, textured look.
Crochet Hook Size Recommendations
The crochet hook size significantly impacts your project’s texture and durability. For pencil cases, opt for hooks between 3.5 mm to 4.5 mm (E to G sizes). Match the hook size to your yarn weight. Using the right hook prevents loose stitches and maintains the shape of the case.
Additional Supplies (Zipper, Buttons, etc.)
To complete your pencil case, you need closure items. Zippers are ideal for secure storage and make the case functional. Buttons or Velcro can serve as alternatives. Decorative add-ons like beads, patches, or embroidery threads can personalize your case. Have scissors, a tapestry needle, and stitch markers handy for finishing details.
Preparing Your Crochet Workspace
Setting up a proper crochet workspace is key to crafting a pencil case smoothly. A well-organized, comfortable environment can enhance creativity, minimize mistakes, and make the process enjoyable.
Choosing the Right Environment
Select a quiet and bright space to crochet. Good lighting ensures you see stitches clearly. Aim for a comfortable chair to avoid strain during long crafting sessions. Keep the area free from distractions to maintain your focus.
If natural light isn’t available, use a desk lamp or focused lighting. A clutter-free surface lets you work efficiently. Choose a table or flat surface with enough room for tools and materials.
Organizing Materials for Efficiency
Arrange your supplies to save time while crafting. Keep yarns, hooks, scissors, and needles within reach. Use containers or baskets to separate tools and ensure easy access.
Wind your yarn into neat balls for smooth stitching. Label materials for easy identification, especially if using multiple colors. Place stitch markers and closures like zippers in a small box for convenience.
By preparing your workspace thoughtfully, you ensure a seamless crochet experience and a beautiful pencil case.
Basic Crochet Techniques to Know
Learning the basic crochet techniques is vital for successfully crafting a pencil case. These fundamental skills play a crucial role in making your project appear polished and professional. With attention to detail and practice, you can achieve stunning results that you’re proud to showcase.
How to Create a Chain Stitch
The chain stitch serves as the foundation for most crochet projects. To begin, start with a slip knot on your hook. Next, yarn over and pull through the loop on the hook. It’s essential to repeat this motion until you reach your desired number of chains. The chain stitch not only sets the starting point but also determines the width of your pencil case. Therefore, it’s important to keep your stitches even and consistent. This uniformity results in a tidier final product and enhances the overall appearance of your work.
Single Crochet and Double Crochet Basics
Once you’ve mastered the chain stitch, you can proceed to single crochet, a convenient and versatile stitch that’s perfect for composing the body of the pencil case. To execute a single crochet, insert your hook into a stitch, yarn over, and pull up a loop. After that, yarn over once more and pull through both loops on the hook. This stitch is fundamental for building the necessary structure.
For added height and texture, you can incorporate the double crochet stitch. Begin by yarning over and inserting your hook into a designated stitch. Then yarn over again and pull through a loop, leaving three loops on your hook. Yarn over and pull through the first two loops, then yarn over again to pull through the final two loops. Practicing these stitches will enhance your skill level and help you create a sturdy and attractive pencil case.
Understanding Gauge and Tension
An equally important concept in crochet is gauge, which measures the number of stitches per inch. To ensure your project meets the required dimensions, it’s advisable to create a test swatch to check your gauge before diving into the actual project. Additionally, tension significantly affects not only the shape but also the firmness of your pencil case. Keeping a steady grip on the yarn will aid in preventing loose or overly tight stitches. If your gauge doesn’t align with the pattern requirements, consider adjusting your hook size. Achieving a balanced gauge and consistent tension ensures your pencil case turns out just as you envisioned. Through practice and attention to these fundamentals, you’re well on your way to mastering crochet techniques and creating beautiful items.
Step-by-Step Instructions to Crochet the Pencil Case
Follow these simple steps to create your crochet pencil case. Each step builds on the last, ensuring a smooth and easy crafting process.
Creating the Base of the Pencil Case
- Start with a slip knot and chain stitches: Make a slip knot and crochet a chain equal to the length of the pencil case.
- Add a foundation row: Work single crochet (SC) stitches into each chain to form a stable base.
- Turn the work: Chain one and turn your piece to start the next row.
- Continue rows for thickness: Crochet rows using single crochet until the base reaches your desired thickness.
Keep your stitches consistent for a neat and uniform foundation.
Building the Body of the Case
- Begin the body after the base: Once the base is ready, you’ll build upwards.
- Crochet in rounds: Start working single crochets in rounds around the base, creating upward rows.
- Switch colors if needed: For stripes, change yarn colors at the beginning of a round.
- Maintain even tension: Check your gauge to ensure the body’s shape stays even.
- Adjust for height: Continue crocheting in rounds until the case reaches your desired height.
This step is important for giving the case a sturdy yet flexible structure.
Adding Edging for a Neat Finish
- Single crochet around the edge: Begin by working single crochet stitches along the top edge of your project. This step will create a clean and tidy finish. Aim for even tension to ensure uniformity.
- Use a decorative edging: To elevate the appearance of your work, consider incorporating decorative edging. Options like scalloped or picot stitches can add a delightful touch. These embellishments provide visual interest and showcase your creativity.
- Secure the stitches: Once you are satisfied with your edging, tie off the yarn securely. This prevents any unraveling and keeps your work intact. After tying off, use a tapestry needle to weave in any loose yarn ends. This ensures a polished look.
- Benefits of adding edging: Implementing edging not only enhances the aesthetic but also improves the durability of your piece. A well-finished edge can withstand wear and tear better than raw edges.
- Overall impact: In conclusion, adding edging is a simple yet effective way to finish your project. It offers both functionality and style, making your finished item look professional and well-crafted.
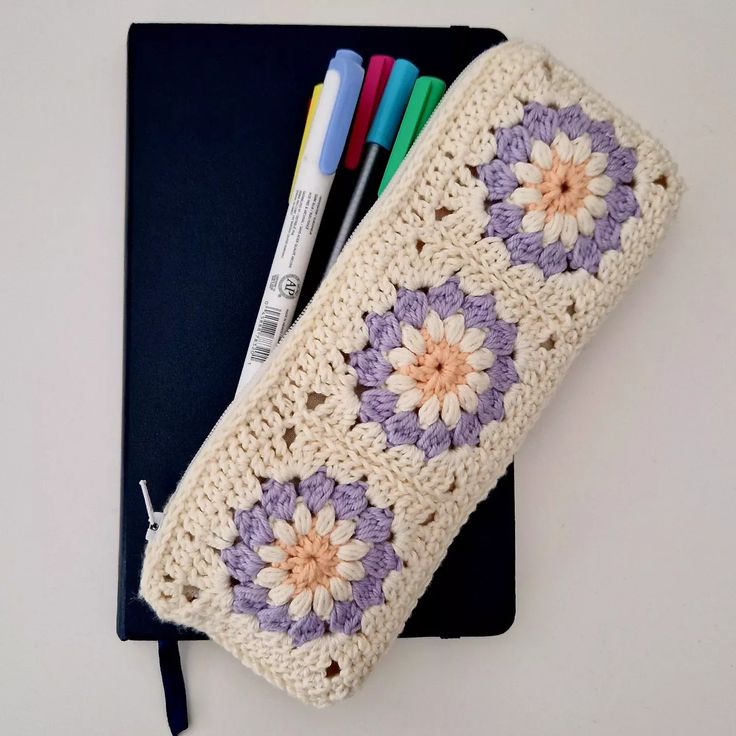
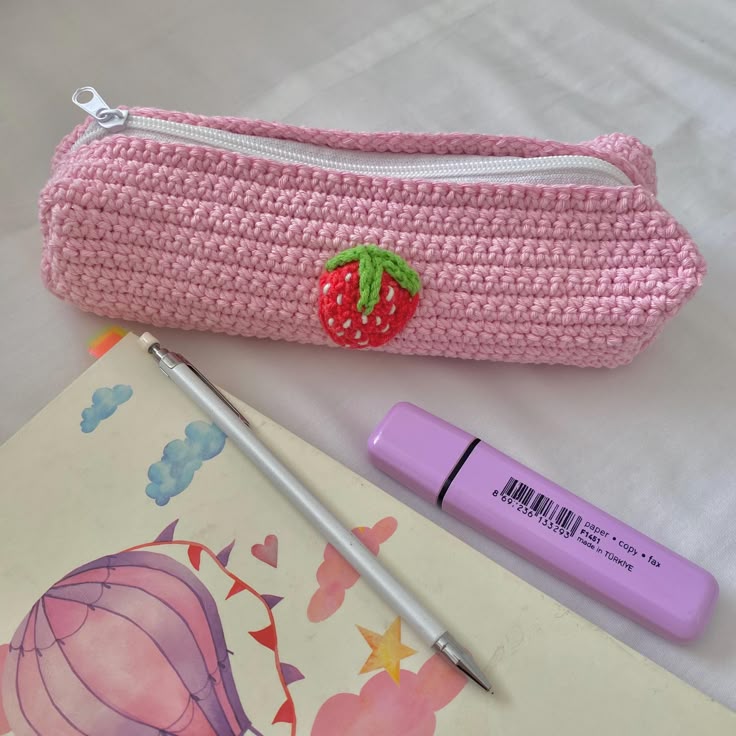
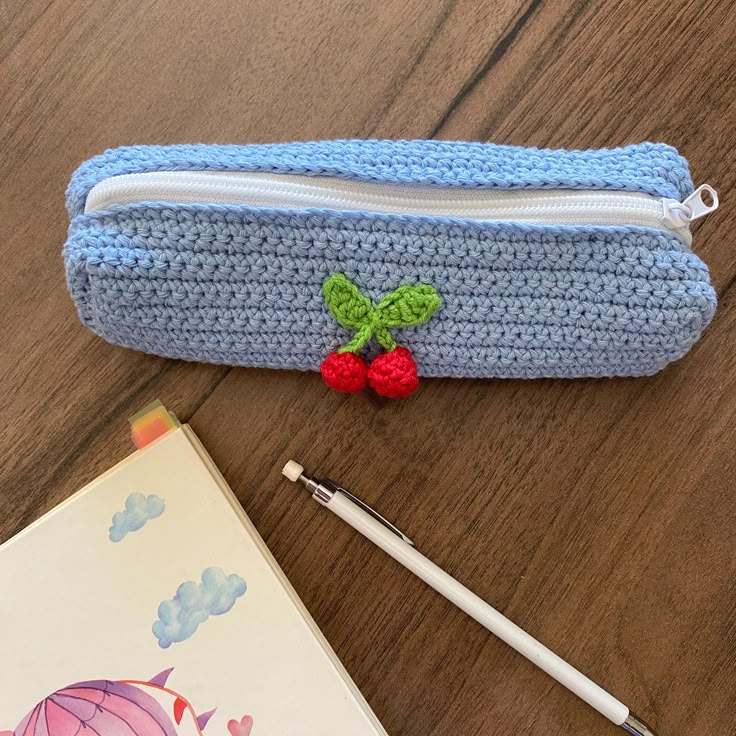
Adding Decorative Elements
Enhancing your crochet pencil case with decorative elements elevates its style and uniqueness. These additions personalize your project and make it truly stand out.
Embroidering Designs on the Case
Embroidery adds charm and custom flair to crochet projects. Follow these steps to embroider your pencil case:
- Choose embroidery threads: Select colors that complement your yarn.
- Sketch the design: Draw simple shapes like flowers or initials on paper for reference.
- Mark the crochet surface: Lightly mark where the design will go using removable fabric chalk.
- Use a tapestry needle: Thread the needle with embroidery thread that matches your design.
- Stitch the pattern: Sew your chosen design, using basic embroidery stitches like backstitch or satin stitch.
- Secure the threads: Tie off and weave in all loose ends neatly.
Embroidery boosts visual appeal and makes the case more personalized.
Incorporating Beads or Other Accessories
Accessories like beads add texture and sparkle to your pencil case. Here’s how to incorporate them:
- Select the beads: Choose beads that fit your style and coordinate with the yarn.
- Attach beads while crocheting: Slide beads onto stitches during crochet rounds for integrated design.
- Add beads afterward: Sew beads onto finished sections for controlled placement.
- Explore alternatives: Use sequins, small charms, or buttons for unique accents.
- Test placement: Arrange accessories before securing them to avoid mistakes.
Decorative additions make your crochet pencil case both functional and fashionable.
Installing a Zipper or Closure
Adding a closure improves the functionality and design of your crochet pencil case. Follow these methods for securing a zipper or using alternative closures like buttons or Velcro.
How to Seamlessly Attach a Zipper
- Choose the correct zipper size: Match the zipper length to the pencil case’s opening.
- Prepare the zipper: Use a seam ripper to remove bulky edges if necessary.
- Pin the zipper to the crochet case: Align the zipper with the opening and pin securely.
- Sew the zipper in place: Use a tapestry needle and matching thread to sew the zipper evenly.
- Test the zipper: Open and close it multiple times to ensure smooth functionality.
- Secure loose threads: Tie off and weave in loose ends to tidy the finish.
Alternative Closure Methods (Buttons, Velcro, etc.)
- Using buttons: Sew buttons onto one side and create button loops on the other.
- Velcro strips: Attach adhesive-backed Velcro to both sides of the opening.
- Snaps: Add snap closures for simple and quick fastening.
- Decorative ties: Crochet loops on one side and ties on the other for a rustic look.
- Magnetic clasps: Sew small magnets in hidden spots for a sleek closure.
Choose a closure method based on your style and usability preferences.
Tips for Customizing Your Pencil Case
Customizing your crochet pencil case lets you tailor it to your needs and preferences. By making small changes, you can create a unique handmade item that’s both functional and stylish.
Adjusting Size for Different Uses
- Determine the purpose: Decide what you’ll store, like pencils, crayons, or makeup brushes.
- Measure the required dimensions: Adjust the initial chain length and width accordingly.
- Scale the height: Add more crochet rounds for taller cases if needed.
- Test the fit: Check the size after the base to ensure it matches your plan.
- Adapt closures: Use larger zippers for bigger cases or add extra buttons for wider openings.
With size adjustments, your case can suit a variety of uses beyond just pencils.
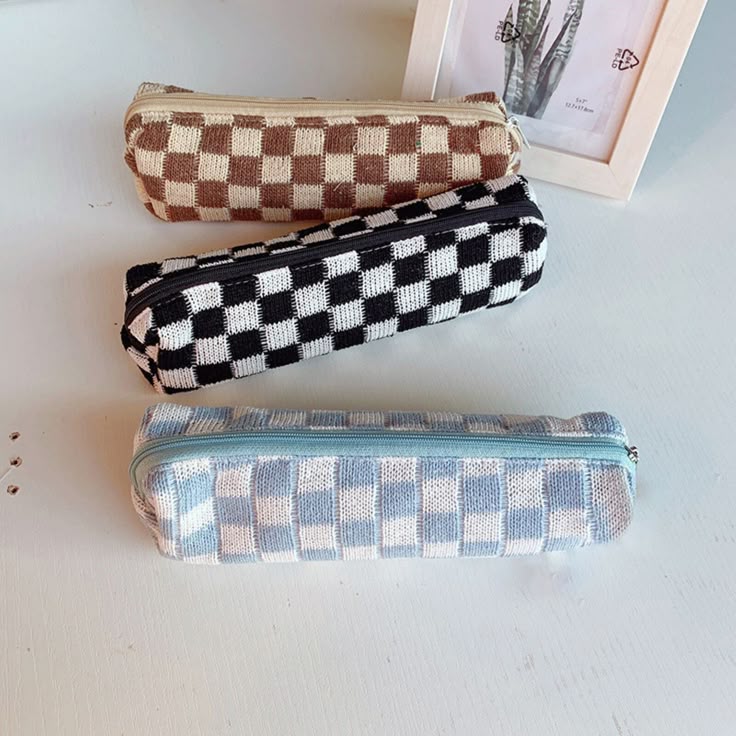
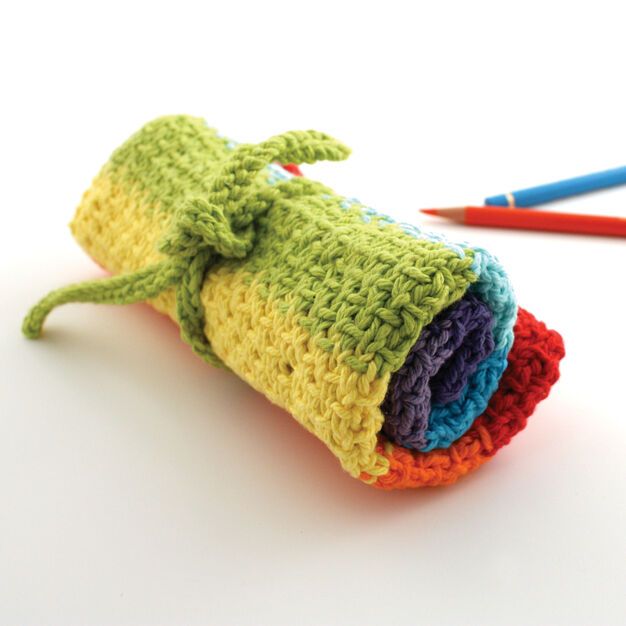
Creating Unique Patterns or Designs
- Mix yarn colors: Combine different shades or variegated yarn for eye-catching patterns.
- Add stripes or color blocks: Switch yarn colors during rounds to create striped or blocked designs.
- Use textured stitches: Try patterns like bobble stitches or herringbone for an interesting finish.
- Incorporate graphics: Crochet shapes like hearts or stars directly into the design.
- Personalize with initials: Embroider letters or symbols for a custom touch.
Creative designs make your pencil case stand out and reflect your personality.
Customizing ensures your crochet pencil case is both functional and completely unique.
Caring for Your Finished Crochet Pencil Case
Taking care of your crochet pencil case helps it last longer and keeps it looking new. Proper cleaning and storage are essential to maintain its quality.
Cleaning and Maintenance Tips
- Check yarn care labels: Read washing instructions specific to the yarn you used.
- Handwash gently: Use lukewarm water and mild detergent to clean your pencil case.
- Avoid harsh scrubbing: Gently squeeze or soak to remove dirt without damaging the stitches.
- Rinse thoroughly: Wash out all detergent with gentle rinsing to avoid residue buildup.
- Do not wring: Press out excess water using a towel to keep the shape intact.
- Dry flat: Lay the pencil case on a flat surface to air-dry completely.
- Avoid direct sunlight: Drying in shade prevents fading and keeps colors vibrant.
- Do spot cleaning if possible: Remove minor stains without washing the entire case.
- Trim loose threads: Use scissors to cut any loose yarn ends to prevent unraveling.
Regular cleaning, done correctly, preserves the durability and appearance of your handmade pencil case.
Storing Your Handmade Items Properly
- Choose a dry area: Store your pencil case in a place free from moisture to avoid mildew.
- Avoid overcrowding: Keep it in a spacious spot to maintain its shape.
- Use a breathable bag: Place your pencil case in a cotton or mesh bag for protection.
- Protect from pests: Use lavender sachets or cedarwood in storage to deter insects.
- Keep away from direct sunlight: Prevent fading and color changes by storing in a shaded area.
- Fold gently if needed: Avoid harsh creases that distort the structure of the pencil case.
With proper storage, your crochet pencil case will remain in excellent condition for years to come.